
Tuesday 20 November 2012
Hush Book Cover Competition
Hush, a luxury lounge wear company, are publishing a book of short stories with the theme of 'hush.' It was a lovely brief, as we were just asked to produce an image which suggested this theme. Moving on from my last dry point etching, I decided to try a more controlled approach to the oil paint layer behind. I'm pleased with the effect, it adds definition to the details.

Friday 19 October 2012
Cloud Atlas


Thursday 30 August 2012
Animation for Pleasance: Edinburgh Fringe
I worked with animator, Tim Wheatley, on a project for Pleasance at the Fringe Festival; it was a film to be projected in the Pleasance Courtyard as part of the visual effects. We came up with the idea of following a group of high-five-ing, intrepid mice on their epic road-trip from Cornwall to Edinburgh, picking up all their hitch-hiking rodents as they go. Theres nothing like a road trip... The Mice Are Out!
I loved making the film, shot with a mixture of stop-motion, (often taking a mouse each) and film footage using a Go-pro camera, which adds to what we came to think of as the 'quality-cheese effect' which I guess is the knowingly home-made, sort of natural feel of the film. We edited using After Effects.
To find out more about our mice go to:
facebook.com/pages/The-Mice-are-Out/108829615885661?sk=wall&filter=3
The Mice are Out! from Poppy Rand on Vimeo.
Friday 10 August 2012
Another direction for the summer
Looking back at old A-level work I thought that it would be very interesting to try out more charcoal drawing, going back to the beginning of my work and Fine Art. I have started taking photos of my favourite trees and I plan to make a collection of their drawings. I love working with charcoal, crushing it up in fabric to use like a powder and then building up layers of depth. Here is how I've started...


Final Characters!
This was finished by the end of term!... here is a catch-up...I'm glad I did this project as it means I would't think twice before making smaller sets to photograph for illustration, as it feels like I could build on what i've learnt. I think i've set myself up with some good prop-making skills and next, some adult illustration might help me broaden how I think in 3D.
Here are some photos!


 |


Tuesday 8 May 2012
Rough Plasticine Character Design for ebook!
I spent this afternoon playing with plasticine! It was very satisfying, I've never used it for faces before, I always used Daz an air dry clay, so it was brilliant as you don't have to be so careful with it as there is no water involved. I like to be able to paint faces, thats why I've always used clay, but I was surprised how easily plasticine blends. I could experiment with that as I need her face to be malleable for stop motion.


 |
| Softer hair is appealing, I might opt for that. |


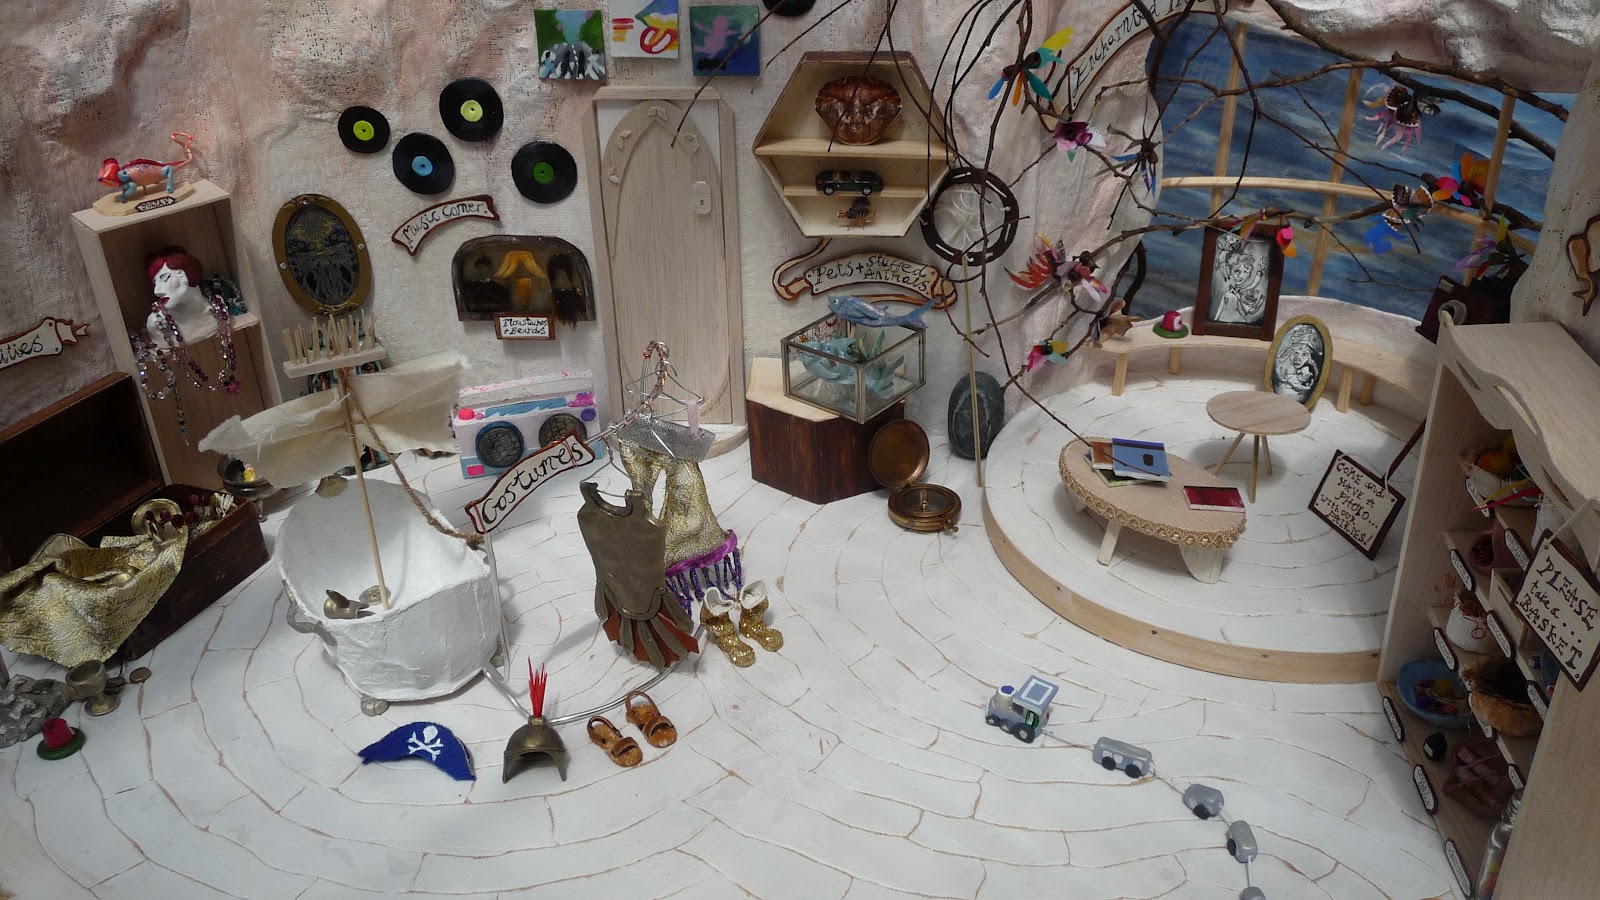
Next Stages! 3D set
This week I have been working on ideas for the ebook to go with this set. There are lots of different clips of animation I could plan so that people could explore the shop and watch and read the story that surrounds it. I have also done the next stages of building!


 |
| I had a lot of fun with the floor, I used polyfila, and once it was dryer, I scraped into it to create a white washed wooden floor. It was time consuming but I think its effective! |

 |
| I had to steam the wood again so that the bay window could have a curved middle bar, I used a lot of super glue to hold the bars in place. |

 |
| I added colour to the walls with watered down acrylic. I went for a warm palette. |


Thursday 3 May 2012
3D SET!
I started building my set this last week, its very exciting and theres always a small problem to be thought through. I've learnt about materials as I went so here is a sped up version of the stages. After many hours sawing, discovering a longing for many power tools, and lots of decisions about the overall shape of the space this is where i've got to!


 |
| I used a straight saw to cut my base and sides to the right size and a hack saw for the corners. |
 |
| For my circular platform, where my character will sit overlooking her shop from, I had to use a straight saw to cut the edges of before using the hack saw... It took quite a while...but was very satisfying. |
 |
| A circle at last. |
 |
| After gluing my sides on and hammering little nails into place, I steamed a small piece of dowel so that it would bend around my circular platform. |

 |
| Here are some experiments with polyfilla. I will use it on the floor to add texture, such as wooden flooring. |
 |
| I spent a while cutting out my bay window in thick cardboard, I was worried it wouldn't bend or would lose shape because of the cut window, but it held its shape woo! I nailed it to the base. |
 |
| I wanted to create warped and bumpy walls to make it less harsh and more weathered looking, so I glued paper onto the walls in shapes that followed the curves of the walls before covering them with mudrock. I love mudrock its perfect for softening looks and the joins work as wall paper joins. |
 |
| I mainly include this because of the twinkle on the paintbrush... It was lovely being able to work outside in the sun for a while! |


 |
| Here I'm polyfilling the floor so that I can scrape in a wood plank effect, which follows the curves of the walls and where I will position the artefacts in the shop. I like the idea of creating a path in the shop and stuffing it full to the brim, in curves. I ran out of filler, so now I'm off to Trago. |
Friday 27 April 2012
New 3D Project for a narrative book or Ebook
So, my next project is in the ideas stages, but I know its going to be a narrative, based around building a set which is highly exciting. I thought about settings as a starting piont as I knew I would be spending a lot of time building a space and before Easter when i was thinking generally, I narrowed it down to either an Artists studio or an antique shop, as both have the potential for a little charracter to come in and cause chaos. I've now decided on an antique/costume/nick-nacks shop, as it has so much potential for stories to be told aboout the origins of the objects. I can use this to photograph for a childrens traditional book or animate with for an Ebook, which would be a new experiance. I will upload some pictures when I try out some roughs!
Puffin Post for Pufflings Competition!
I'm not very good at blogging as I go, so this is going to be the start, hopefully, of a better blogging phase! Last week I used the same technique of oil on paper to do a quick project for a Puffin Post magazine competition. It was such a great brief, as the only requirement was that it should include puffins. I decided to paint a party in the sky, where the puffins who are very fluffy, are bobbing on a fleat of balloons and edging towards a fish-filled cake. I loved adding details such as the goldfish in the tea cups and the crab on the baloon string. Its sometimes just so great to paint something thats purely a happy scene.


Friday 16 March 2012
In The Attic
This was a children's book I illustrated earlier in the term, using Hiawyn Oram's poem 'In the Attic.' It was a really exciting project and one of my favourites so i thought I should post it! I decided to interpret 'the attic,' as a huge tree over a house boat. I used oil on paper which was brilliant as I loved the vibrant light you can achieve with it. Although the originals will deteriorate, oil on paper was great as it dried so much more quickly and could be scanned in. I enjoyed painting my glowing character and making the dummy book, I would definitely think about trying a similar style again.


Subscribe to:
Posts (Atom)